
Play Video Games on ESP32 TFT Touch Screen
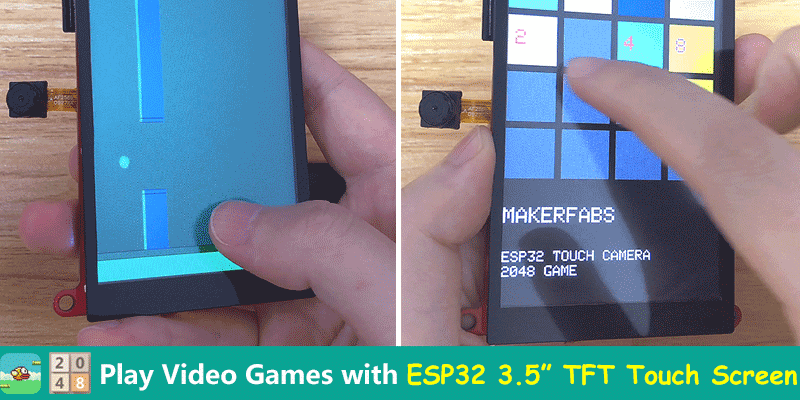
We will learn how to play video games on ESP32, using the ESP32 & 3.5″ ILI9488 TFT Touch Screen display, to play the "flappy bird" and "2048" game.
1. Overview
In this project, we will make few video games using ESP32 & 3.5 inch ILI9488 TFT Touch Screen Display. The customized board is designed and manufactured by Makerfabs and has a combination of ESP32-WROVER chip + 3.5″ TFT Display + 2 MP Camera + SD Card slot.
But in this project, we will not be using the Camera or the SD Card slot. Rather we will use the ESP32 & ILI9488 TFT Touch Screen Display and write the Arduino Code for video game support. The board can be programmed with the Arduino Code or Micropython code. But this section explains the use of Arduino Code to make video games.
2. ESP32 3.5″ TFT Touch(Capacitive) with Camera
This is a beautiful 3.5" TFT touchscreen display, based on ESP32-WROVER chip, with a built-in 2M pixel OV2640 camera. The combination of all these gives a perfect platform for ESP32 Application like Video Games.
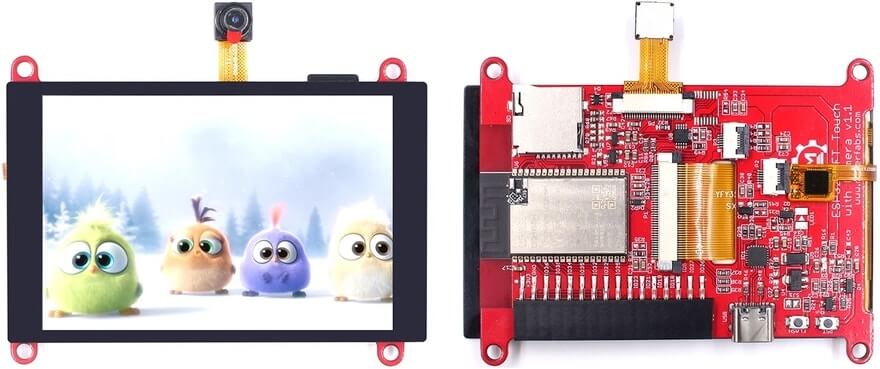
The TFT LCD driver is basically ILI9488 & has a dimension of 3.5″ with 320x480 screen resolution. The ILI9488 LCD uses SPI for communication with the ESP32 chip. The SPI main clock could be up to 60M~80M, make the display smooth enough for videos. The camera module on this board is an OV2640 Camera with a 2MP resolution.
With this camera, you can make applications such as remote photography, face recognition & security system projects. While the camera is not used, you can freely use all these pins with the breakout connectors. You can then connect the ESP32 display with sensors or modules & use it for any IoT applications. The ESP32 chip support Arduino or MicroPython programming.
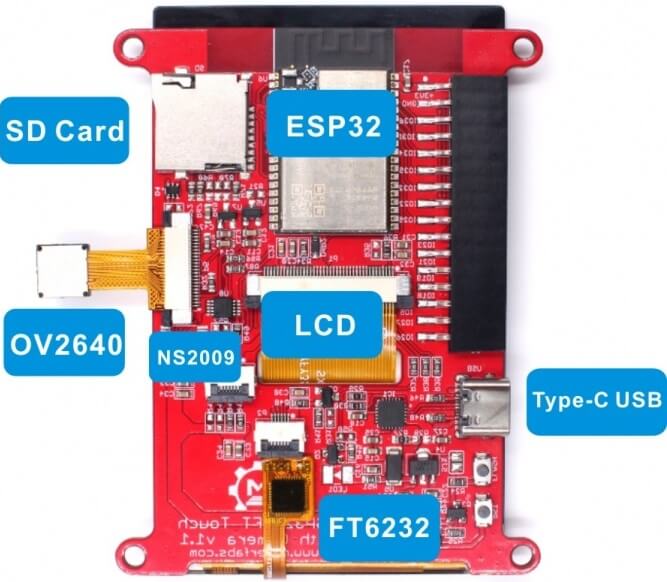
The board is having a micro SD-Card slot for attaching an external SD-Card. The SD Card can be used for storing files and images. There is a type C USB Port, basically a USB to UART converter for ESP32 programming. You can connect a Type-C data cable to the board & directly upload the code to the Board.
2.1 Specification
1. 3.5 inch display, 320x480
2. Capacitive/Resistive Touch
3. ESP32-WROVER Controller
4. WIFI/ BLE Connection.
5. Onboard USB2UART convertor for ESP32 programming
6. 2M pixel OV2640 Camera
7. OV2640 supports output images up to 2 million pixels
8. LCD 3.5-inch Amorphous-TFT-LCD for mobile-phone or handy electrical equipment
9. LCD Driver: ILI9488
10. LCD Resolution: 320*480
11. Micro SD card slot on the board
12. NS2009: A 4-wire resistive touch screen control circuit
13. FT6236: single-chip capacitive touch panel controller Integrated Circuit
14. Power supply: 5V, Type-C USB
2.2 Purchase Link
There are two versions of ESP32 3.5″ TFT Touch Screen with Camera. One is the Capacitive Type and the other the resistive type. You can use any of the display that you want. The purchase Link for both the display is given below.
1. Resistive Type ESP32 TFT Touch Screen Camera: Purchase Link
2. Capacitive Type ESP32 TFT Touch Screen Camera: Purchase Link
3. Preparing & Programming the Board
1. Install the ESP32 boards supporting
You need to install ESP32 Board to the Arduino IDE. To do that Select “File>Preferences>settings>Additional Boards Manager URLs” to fill the link: https://dl.espressif.com/dl/package_esp32_index.json.
2. Install the LovyanGFX Library
LovyanGFX Library is a library for LCD Graphics driver with touch for ESP32 and SAMD51. It supports the TFT Touch Screen Display like ILI9163, ILI9342, ILI9341, ILI9486, ILI9488, ST7735, ST7789, ST7796, SSD1351. Download and add this library to the Arduino IDE: LovyanGFX Library.
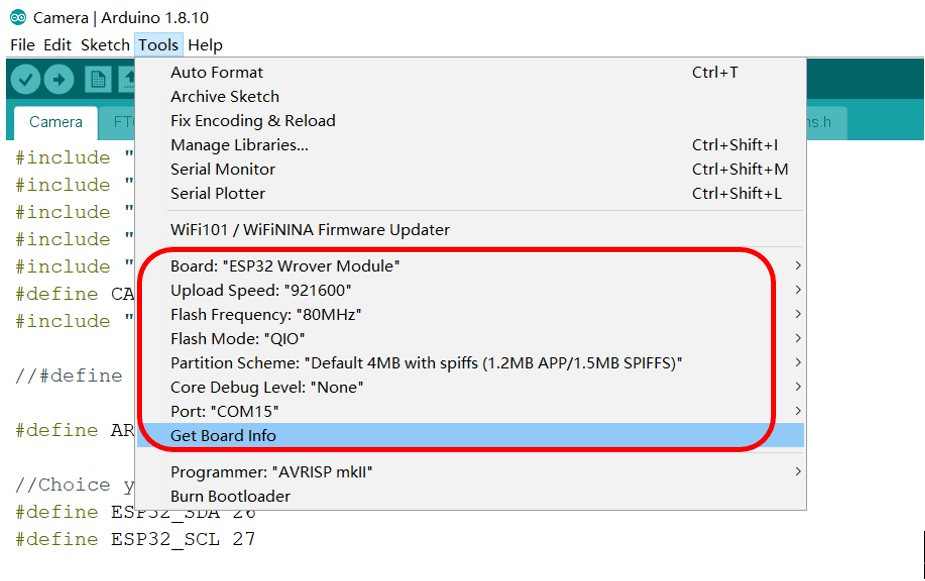
3. Setting ESP32 Parameter in Tools Menu
4. ESP32 2048 Video Game

2048 is often played on a gray 4x4 grid, with numbered tiles that slide when a player moves them using the four arrow keys. Every turn, a new tile will randomly appear in an empty spot on the board with a value of either 2 or 4. Tiles slide as far as possible in the chosen direction until they are stopped by either another tile or the edge of the grid. If two tiles of the same number collide while moving, they will merge into a tile with the total value of the two tiles that collided. The resulting tile cannot merge with another tile again in the same move.
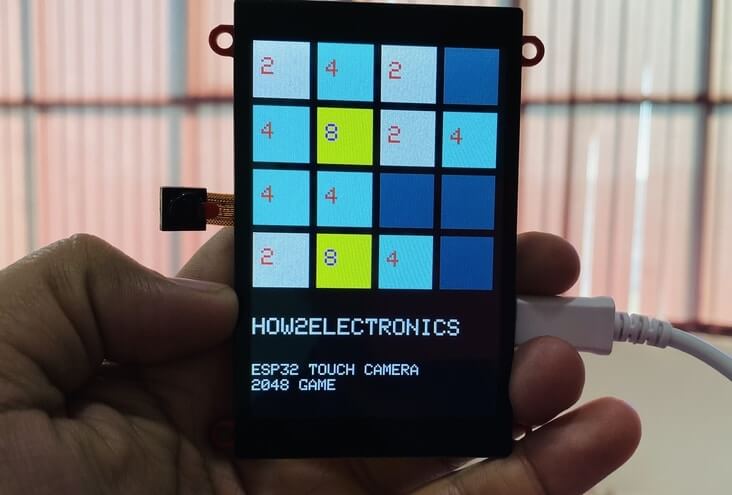
4.1 How To Play 2048?
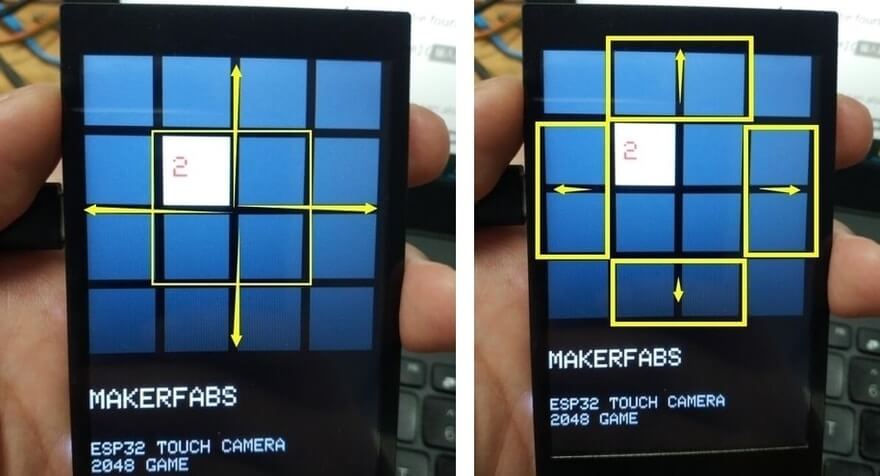
1. Click on the first row with your finger the second and the third are up.
2. Click with your finger on the fourth row and the second and third rows are down.
3. Click on the first column with your finger and the second and third columns are left.
4. Click on the fourth column with your finger and the second and third columns are right.
5. Of course, you can also use your fingers to slide around from the middle four squares.
4.2 Source Code/ Program
The given link contains the code/program folder for ESP32 TFT Touch Screen Display based 2048 video game. You can download the code and extract it. The select the ESP32 Board & upload the code to the ESP32 Board: Source Code.
Before uploading code, select either the touchscreen type is resistive or capacitive.
| #define NS2009_TOUCH //Resistive screen driver #define FT6236_TOUCH //Capacitive screen driver |
5. ESP32 Flappy Bird Video Game

Flappy Bird is an arcade-style game in which the player controls the bird Faby, which moves persistently to the right. The player is tasked with navigating Faby through pairs of pipes that have equally sized gaps placed at random heights. Faby automatically descends and only ascends when the player taps the touchscreen. Each successful pass through a pair of pipes awards the player one point. Colliding with a pipe or the ground ends the gameplay.
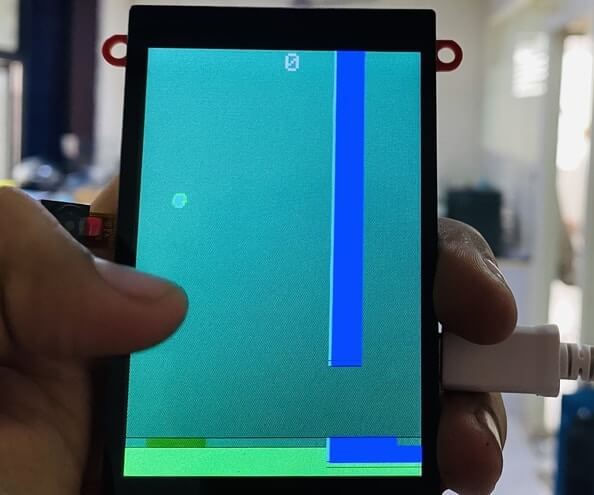
5.1 Source Code/ Program
The given link contains the code/program folder for ESP32 ILI9488 TFT Touch Screen Display based Flappy Bird Video Game. You can download the code and extract it. The select the ESP32 Board & upload the code to the ESP32 Board: Source Code.
Before uploading code, select either the touchscreen type is resistive or capacitive.
| #define NS2009_TOUCH //Resistive screen driver #define FT6236_TOUCH //Capacitive screen driver |
You can use the same product to make your own ESP32 video games or game console.
6. Video Tutorial & Guide
You can use this product for so many other applications like imaging, photography, photo veiewer and drawing.
This article is originally posted on How2electronics. If you have any further questions, or need some PCBA customizations based on those IoT boards, feel free to contact service@makerfabs.com.
Also check this video by Makerfabs to see more demos of ESP32 3.5 Inch TFT Touch With Camera:


 Previous


